
1. 什么是Rabbitmq
Rabbitmq 是一款由erlang开发的基于AMQP协议的消息队列。官网地址https://www.rabbitmq.com 有六种工作模式。详细的教程在本文就不再赘述,可以直接去官网阅读。
2. 安装RabbitMq
安装环境CentOS7,步骤如下:
- 从源码安装
#下面是从源码master分支安装示例
git clone https://github.com/erlang/otp.git
cd otp
./otp_build autoconf
./configure
make
make install
安装完成之后,记得修改/etc/profile,设置erlang的路径
vim /etc/profile
export ERLANG="/usr/local/lib/erlang/bin/"
export PATH=/usr/local/php/bin:/usr/local/nginx/sbin:$PATH:$ERLANG

source /etc/profile
- 安装socat
sudo yum install socat
- 下载Rabbitmq-server安装包
wget https://github.com/rabbitmq/rabbitmq-server/releases/download/v3.8.2/rabbitmq-server-3.8.2-1.el7.noarch.rpm
rpm -ivh --nodeps rabbitmq-server-3.8.2-1.el7.noarch.rpm
一定要注意加上--nodeps, 不然会提示erlang依赖版本问题
- 启动服务端
rabbitmq-plugins list #查看组件是否正常显示
rabbitmq-plugins enable rabbitmq_management # 加载web管理组件
rabbitmq-server #启动服务端
在浏览器里输入http://localhost:15672,看后台是否出来,默认账号密码都是guest
3. RPC下如何工作
在上面的web页可以添加用户,由于默认的guest是不允许在外网访问,所以我们新增了yhw这个用户
从官网下载教程代码。到php目录下执行composer install。修改好配置之后我们启动rpc_server.php和rpc_client.php即可。
最后附上修改的测试代码。
rpc_server.php
<?php

require_once __DIR__ . '/vendor/autoload.php';
use PhpAmqpLib\Connection\AMQPStreamConnection;
use PhpAmqpLib\Message\AMQPMessage;

$connection = new AMQPStreamConnection('10.211.55.3', 5672, 'yhw', 'yhw');
$channel = $connection->channel();

$channel->queue_declare('rpc_queue', false, false, false, false);

function fib($n)
{
    if ($n == 0) {
        return 0;
    }
    if ($n == 1) {
        return 1;
    }
    return fib($n - 1) + fib($n - 2);
}

// 我增加的测试函数
function sayHello($n)
{
    return sprintf(
        "%s Hello gentleman, I am rabbitmq, working on RPC mode. You typed %d, the result is %d",
        date('Y-m-d H:i:s'),
        $n,
        fib($n)
    );
}

echo " [x] Awaiting RPC requests\n";
$callback = function ($req) {
    $n = intval($req->body);
    echo ' [.] fib(', $n, ")\n";

    $msg = new AMQPMessage(
        (string)sayHello($n),
        array('correlation_id' => $req->get('correlation_id'))
    );

    $req->delivery_info['channel']->basic_publish(
        $msg,
        '',
        $req->get('reply_to')
    );
    $req->delivery_info['channel']->basic_ack(
        $req->delivery_info['delivery_tag']
    );
};

$channel->basic_qos(null, 1, null);
$channel->basic_consume('rpc_queue', '', false, false, false, false, $callback);

while ($channel->is_consuming()) {
    $channel->wait();
}

$channel->close();
$connection->close();
?>
rpc_client.php
<?php

require_once __DIR__ . '/vendor/autoload.php';
use PhpAmqpLib\Connection\AMQPStreamConnection;
use PhpAmqpLib\Message\AMQPMessage;

class FibonacciRpcClient
{
    private $connection;
    private $channel;
    private $callback_queue;
    private $response;
    private $corr_id;

    public function __construct()
    {
        $this->connection = new AMQPStreamConnection(
            '10.211.55.3',
            5672,
            'yhw',
            'yhw'
        );
        $this->channel = $this->connection->channel();
        list($this->callback_queue, ,) = $this->channel->queue_declare(
            "",
            false,
            false,
            true,
            false
        );
        $this->channel->basic_consume(
            $this->callback_queue,
            '',
            false,
            true,
            false,
            false,
            array(
                $this,
                'onResponse'
            )
        );
    }

    public function onResponse($rep)
    {
        if ($rep->get('correlation_id') == $this->corr_id) {
            $this->response = $rep->body;
        }
    }

    public function call($n)
    {
        $this->response = null;
        $this->corr_id = uniqid();

        // 此处为调用参数,以及回复
        $msg = new AMQPMessage(
            (string) $n,
            array(
                'correlation_id' => $this->corr_id,
                'reply_to' => $this->callback_queue
            )
        );
        $this->channel->basic_publish($msg, '', 'rpc_queue');
        while (!$this->response) {
            $this->channel->wait();
        }
        return $this->response;
    }
}

$fibonacci_rpc = new FibonacciRpcClient();
$n = (int)$argv[1];
while(1){
    $response = $fibonacci_rpc->call($n);
    echo ' [.] Got ', $response, "\n";
    usleep(100);
}
?>
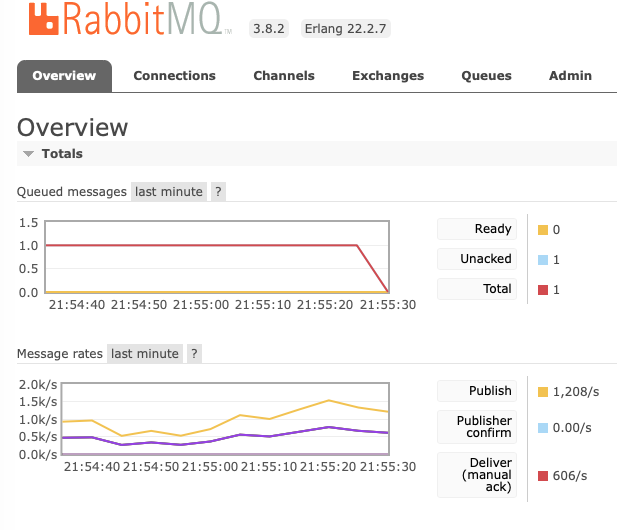
稍微改动下,客户端的代码,多起几个php脚本,看执行结果是否能回复正确。看下面截图结果完全正确。